Saturday, May 28, 2022

Opening the Garage with a Wave of My Hand

So here's the story.  To get into my building's garage, I need to wave an rf-enabled key at a reader.  Problem is that I ride, so I have gloves on.  I have to stop just before the gate, take a glove off, fish the key out of my pocket, stuff it into my other glove, put the first glove back on, then ride up to the gate, scan, and ride in with it still in my glove, fully expecting it to fall out on the way.

A blue cloner, a blue keyfob, and an empty tequila glass.

I don't know how many commas I used enumerating that long sequence of events.  Clearly too many.  Something must be done.  Think of the children.

So, I know that people are getting teenty-tiny rfid chips crammed into their hands.  What if I could glue/sew one of those onto my gloves?  (Spoiler: I ended up going a different way.)  Then I could just ride up, wave my glove, and ride on in!

Step one was to try to duplicate the key at all.  So I popped over to eBay and looked for a duplicator.  The popular match (a blue thing from China) says it's for 125 KHz and a quick search on the interwebs indicated that my keyfob likely is one.  They all come with a few blanks included, even.  I found a US shipper and committed twelve dollars to the experiment.

It arrived, I tried it out (beep boop!) and the duplicate fob it made worked just fine on the garage.  (And the building front door and the elevator.)  I enlisted friends and made copies of their keys for them -- those also worked!

Alright, now to duplicate my key onto a teeny-tiny chip.  That did not go so well.  I mean, I completely got the wrong type of chip, had no idea what I needed, and utterly failed.  (Though now I know exactly which one I needed.)

A simple black ring

There's something really magical about showing people how easy it is to clone these things.  Particularly because there's something really magical about how your apartment building wants to charge you a hundred bucks if you ask them for a spare copy.  These things cost fifty cents, dudes!  (There's a reason why land owners are the first against the wall when the revolution comes.)

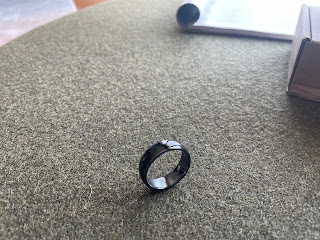
Back to the project though.  During my research I discovered that you can actually get a ring with a chip in it!  Add to cart! Ship it!

And ... success!  Now when I ride, I put on my ring, and opening the garage is just a wave of my hand.  Total cost of the parts (that worked) is under fifty bucks.  And my friends love me because I can make them spares, too.  This was a good project!


Wednesday, April 27, 2022

Updating the Kernelcon 2022 Badge Wifi

So you got home, powered up your Kernelcon 2022 badge, and discovered that it won't boot without the conference wifi network?  It took me a little bit, but I finally figured out how to reflash the thing with new wifi settings.  Turns out you just need to teach an Arduino IDE to talk to an ESP 8266 board, and you can upload the code with new wifi settings easily.

Let's do the Arduino set-up first:

  1. Download and install the Arduino IDE
  2. Open it up and go to File > Preferences
  3. In "Additional Boards Manager URLs" add
    https://arduino.esp8266.com/stable/package_esp8266com_index.json
  4. Hit "OK"
  5. Go to Tools > Board: ____ > Boards Manager
  6. For "Filter your search" type "ESP8266" and let it find the module
  7. Click "Install" and it should download and install the add-on
  8. Click "Close" when that's done
  9. Select Tools > Board: ____ > ESP8266 Boards > Generic ESP8266 Module
  10. Select Tools > Flash size: ____ > 4MB (FS:1MB OTA:~1019KB)
  11. Plug in your badge and switch it on
  12. Go to Tools > Port and select the port it's on.  (Kali picked /dev/ttyUSB0)

At this point, you can load whatever Arduino code you like.  The official Kernelcon badge code uses a JSON library, so if you're going to reload the official code, install the JSON library first.

  1. In the IDE select Tools > Manage Libraries
  2. Search for "ArduinoJson" and click "Install" to add it
  3. Click "Close" when it's done installing.

Finally, let's fetch the original badge code, update the wifi settings, and upload it to the badge.

  1. Download and unzip the ZonkSec kernelcon-2022-badge code
  2. In the Arduino IDE, open kernelcon_watch_v4.ino
  3. This opens all the source files.  Select the wifi.h file tab
  4. Update the SSID and password values and save the file
  5. Select Sketch > Upload and watch it compile and transfer
  6. The badge will restart, and it should use your updated wifi settings as it does.

That's it!  Mess around with the badge code some more, if you like.  Or go find some ESP8266 code and mess with the little guy.  For me, my next step is to try to get the original deauther code running.