
Tin, this is Dremel. Dremel, meet Tin. Pi, I'd like to introduce you to Tin and Dremel.
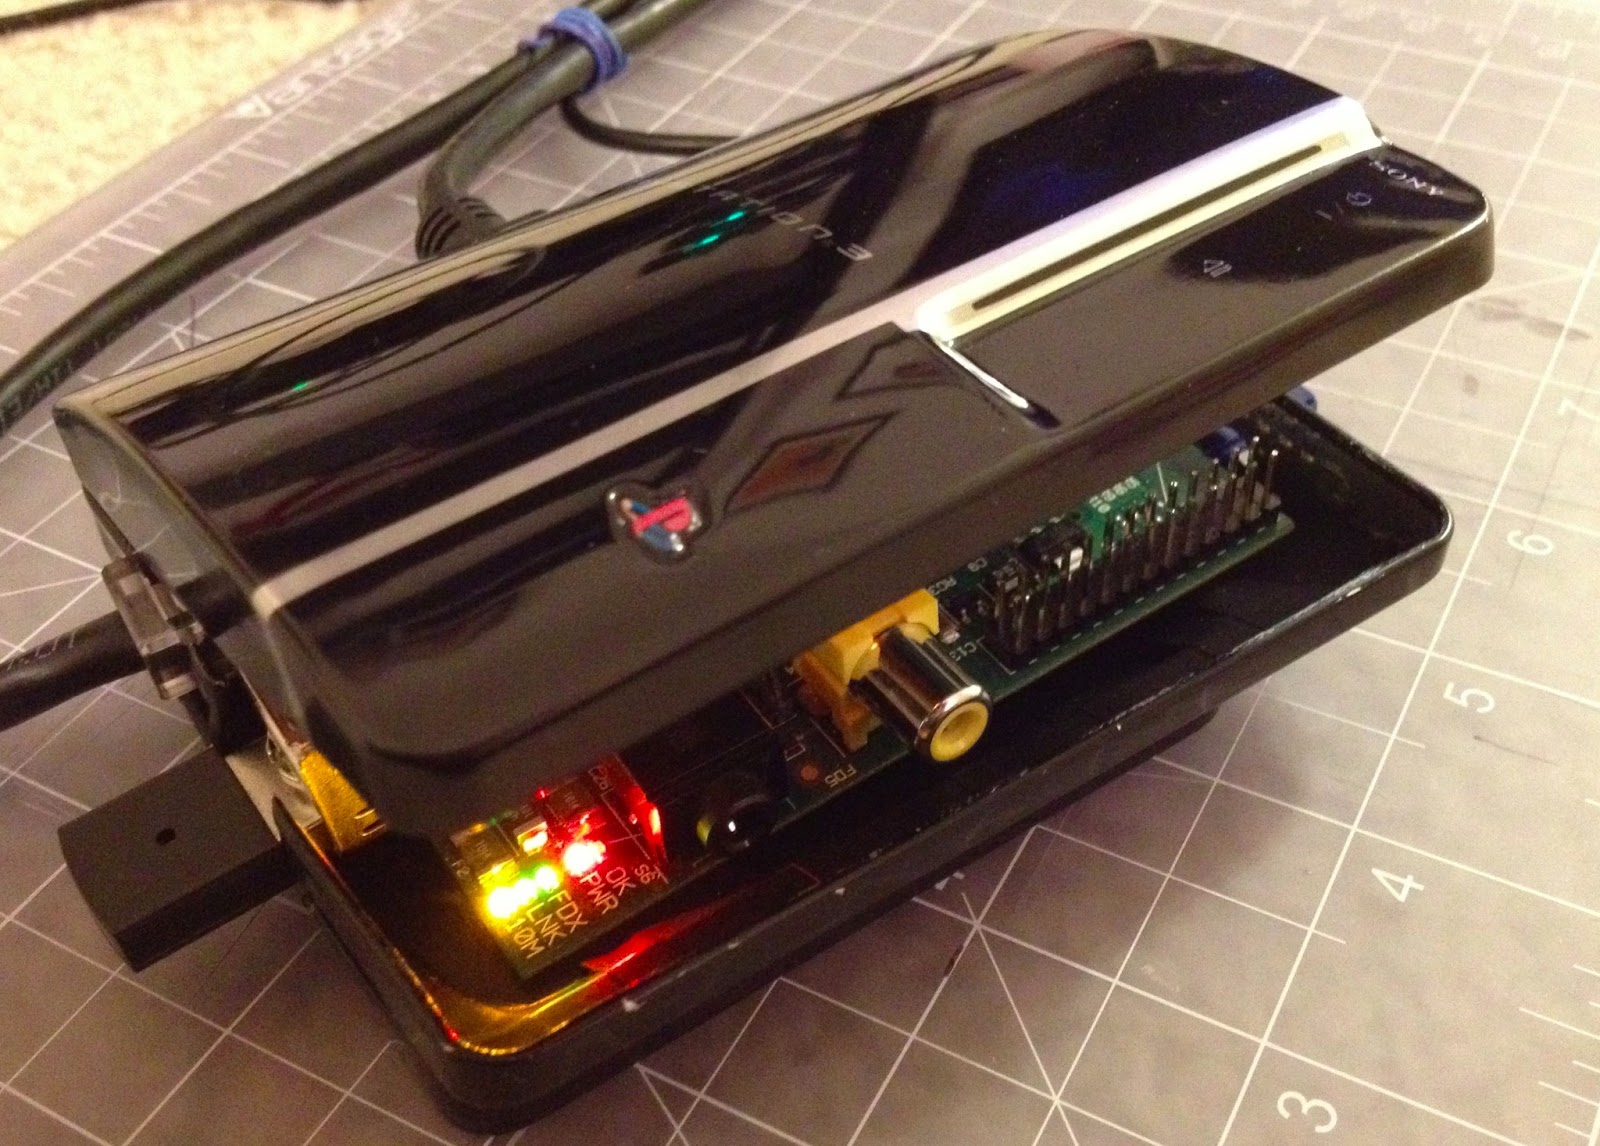
A couple hours later, I've got an enclosure for my Pi that looks really cool sitting next to my full-size PS3. I'm calling it the PS3.14.
do-it-yourself --terse
- Remove felt card-holder insert and plastic ring that makes the lid stay on.
- Drop in Raspberry Pi and measure where the cables will come out.
- Put on eye protection. (Seriously, do not cut metal without eye protection.)
- Cut slots into the tin to accomodate cables.
- Slice a horizontal slot where the SD card will come out.
- Line the bottom tin with electricians' tape to avoid shorting.
- Pop in the Pi and cable it up.
- Put the top tin back on and tape it to the bottom tin, at the back, for a hinge.
- Tidy up your cables and stick the little guy on the shelf next to your real PS3.

do-it-yourself --verbose
Find a workspace that you're not going to mind having metal shards and enamel dust all over. I'd say lay down some newspaper, but you don't want to get all that junk on your iPad.
 Removing the felt piece and the plastic ring are super simple, since nothing's glued down. Pop them out. The felt you can toss, or keep, or sell on ebay. The ring you may want to save for later, if you're ambitious, but you probably don't need it.
Drop in the Pi, and mark where to cut slots for the cables. This is not an exact science, since the Pi is a little smaller than the tin. Just hold it steady in one spot, while you mark all the slot locations. I plugged in my cables to double-check the slot widths .. my HDMI cable, for instance, is wider than the plug, so I needed a wider slot there.

Put on eye protection. Do not skip this step. I know, I sound like your high school shop teacher who insisted you put on goggles even when you were just making that stupid wooden elephant-shaped lamp that never worked anyway. A rotary tool is going to be kicking off metal bits and you do not want those in your eyes. A hack/jig/jeweler's saw is probably not so dangerous, and might be a good alternative, but I didn't try that.
To cut out the cable slots, I used a Dremel Stylus equipped with an EZLock Thin Cut 1 1/2" cutting disk. I varied the rotation speed between 4 and 6, to minimize the sparking and generally keep a little better control over things. Some sparks will fly off, but if you start to go all Jennifer Beals on the thing, slow down and/or use a lower RPM.
 Cutting the SD card slot is sneaky, but simple enough. Hold your SD card against the side of the tin, where it's going to protrude, and mark the width of the slot you're going to cut. Your first cut will be wide enough for the SD card, but not tall enough. Cut another slice right next to that, and repeat until it's large enough. As a guide, the rows of dots dimpled into the side of the tin are about the same thickness as an SD card, so you can just hack out a row of those.
Lining the tin with electricians' tape is intended to keep the exposed circuits on the bottom of the card from shorting against the metal of the tin. Since this is all on the inside, you can be pretty informal about it. I laid long overlapping strips into mine, then cut off the excess around the top lip of the tin and around the borders of the cable slots.
 Attach the lid with a tape "hinge" on the back. A tape hinge at the back will keep the tin halves lined up nicely, while leaving the Pi easily accessible. Initially I tried to glue pieces of the plastic lid-holding ring back into the bottom tin. This was a spectacular failure. On reflection, I'm not sure it would even work the way I wanted, since the plastic part needs to bend a little when the lid is snugly closed. (Extra credit: use curled bits of jumper wire glued somehow to protrude above the lip height, to grab the top tin.)
Plug it all in. You're done. Amaze your friends. Mystify your enemies.
do-it-yourself --debug

If you nick the outside of your tin while cutting it, you may be able to touch up the paint with some black nail polish. (Borrow some from a Goth, maybe.) You should try to do your cutting from the inside of the tin, but it's not possible for all the cuts. If you're nervous, start your cutting with the HDMI slot at the back of the tin, so nicks will be somewhat hidden. You don't have to make the slots full size right from the start -- you can make a small slot to practice, then cut out the full HDMI size once you've got the hang of it.
 So far, I'm not having a cooling problem with mine. It's possible, though, that you can cut the slots so perfectly to size that air won't flow through them. I don't think the Pi runs hot enough that it needs airflow -- the tin can probably conduct the heat out of there -- but you never know. (Extra credit: add a thermistor to your Pi and have Nagios check it.)
I don't know if other tins will fit a Pi. If you do an XBox or Wii, I'd love to hear about it. "Xbox 360.14" doesn't quite have the same ring to it .. but "Wii.14" is kind of fun.
