Wednesday, April 27, 2022

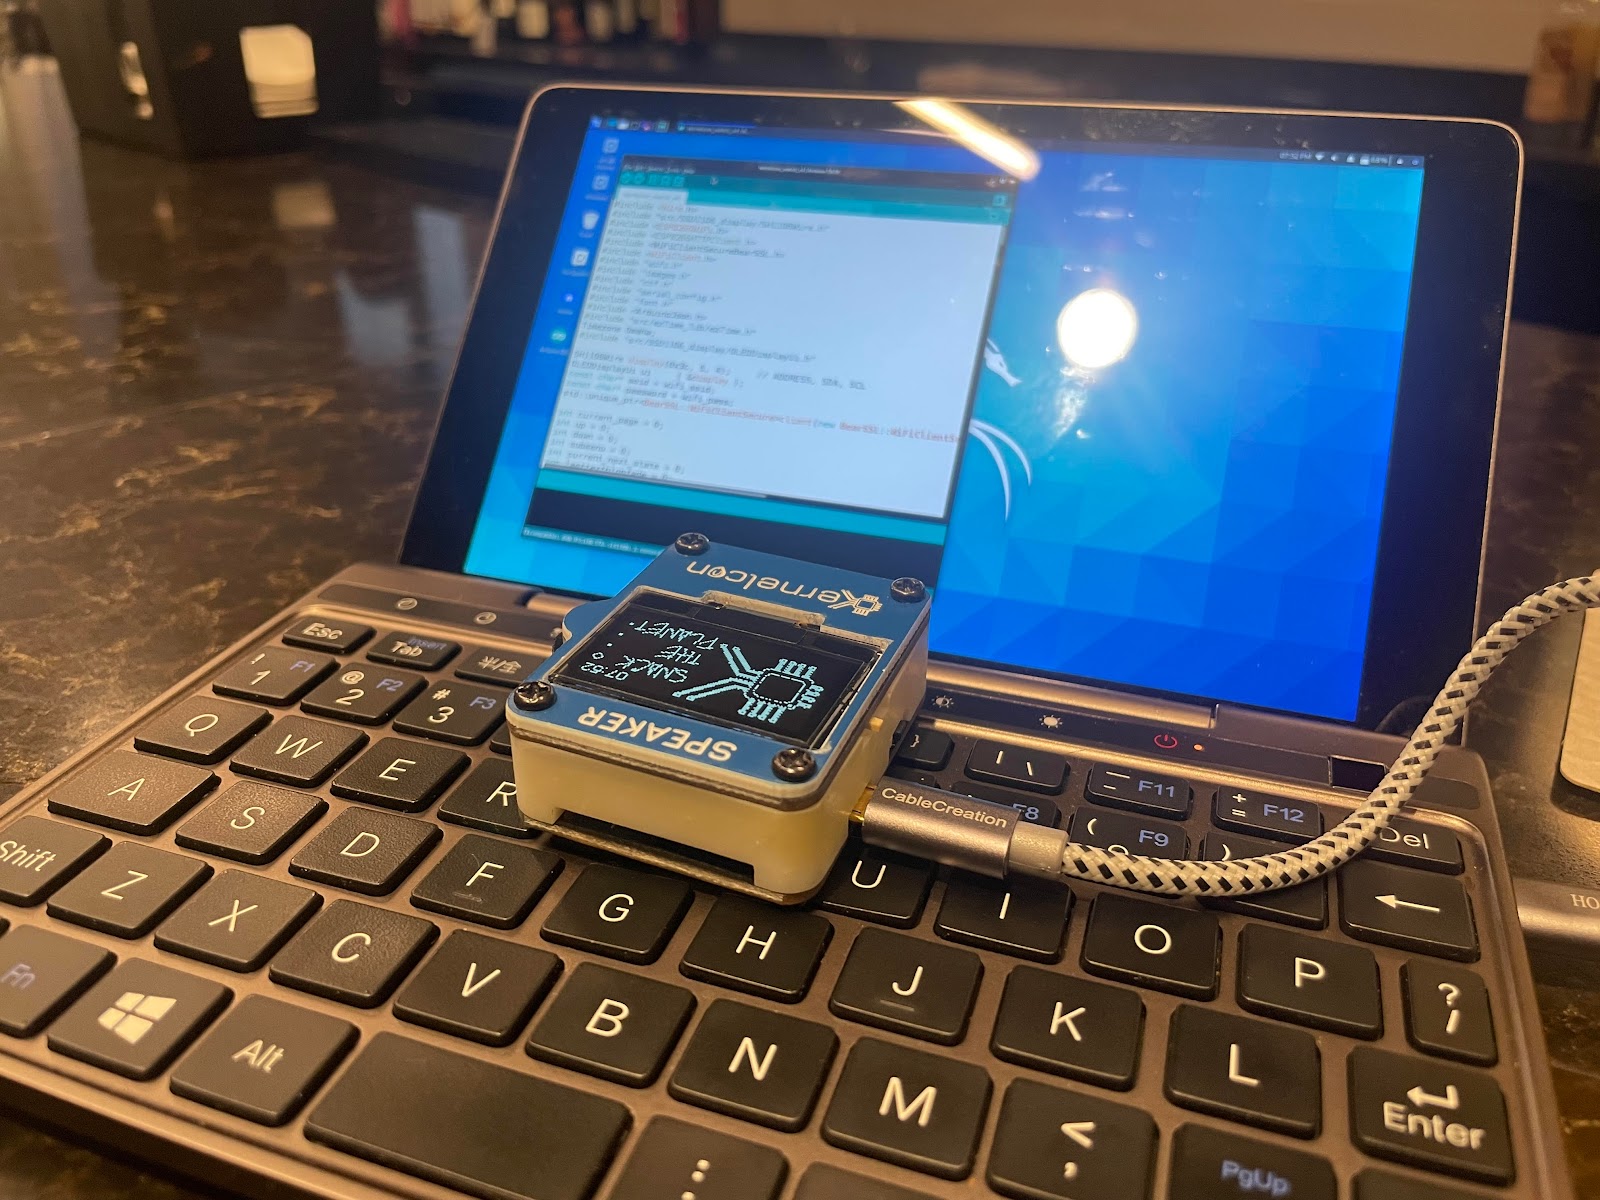
Updating the Kernelcon 2022 Badge Wifi

So you got home, powered up your Kernelcon 2022 badge, and discovered that it won't boot without the conference wifi network?  It took me a little bit, but I finally figured out how to reflash the thing with new wifi settings.  Turns out you just need to teach an Arduino IDE to talk to an ESP 8266 board, and you can upload the code with new wifi settings easily.

Let's do the Arduino set-up first:

  1. Download and install the Arduino IDE
  2. Open it up and go to File > Preferences
  3. In "Additional Boards Manager URLs" add
    https://arduino.esp8266.com/stable/package_esp8266com_index.json
  4. Hit "OK"
  5. Go to Tools > Board: ____ > Boards Manager
  6. For "Filter your search" type "ESP8266" and let it find the module
  7. Click "Install" and it should download and install the add-on
  8. Click "Close" when that's done
  9. Select Tools > Board: ____ > ESP8266 Boards > Generic ESP8266 Module
  10. Select Tools > Flash size: ____ > 4MB (FS:1MB OTA:~1019KB)
  11. Plug in your badge and switch it on
  12. Go to Tools > Port and select the port it's on.  (Kali picked /dev/ttyUSB0)

At this point, you can load whatever Arduino code you like.  The official Kernelcon badge code uses a JSON library, so if you're going to reload the official code, install the JSON library first.

  1. In the IDE select Tools > Manage Libraries
  2. Search for "ArduinoJson" and click "Install" to add it
  3. Click "Close" when it's done installing.

Finally, let's fetch the original badge code, update the wifi settings, and upload it to the badge.

  1. Download and unzip the ZonkSec kernelcon-2022-badge code
  2. In the Arduino IDE, open kernelcon_watch_v4.ino
  3. This opens all the source files.  Select the wifi.h file tab
  4. Update the SSID and password values and save the file
  5. Select Sketch > Upload and watch it compile and transfer
  6. The badge will restart, and it should use your updated wifi settings as it does.

That's it!  Mess around with the badge code some more, if you like.  Or go find some ESP8266 code and mess with the little guy.  For me, my next step is to try to get the original deauther code running.

Saturday, December 11, 2021

Installing wget on MacOS from source

I recently had the time-consuming pleasure of trying to get wget onto my Mac ... without using homebrew.  Don't get me wrong, I think homebrew is a really helpful project, but it also kind of feels like curling a script and piping it into a root shell.  Here's what I did (on MacOS Monterey) to build and install from source.

Step 1: You're going to need either OpenSSL or gnutls libraries (not just the binary) in order to build it.  I chose OpenSSL.  Honestly, I picked it simply because it was the only one I could get to compile.

git clone git://git.openssl.org/openssl.git
cd openssl
./config
make
make -n install   # Dry run, for a sanity check.
sudo make install # Actually do the install.

Step 2:  Now you can compile wget -- we just need an extra flag in the configure step, to tell it we're using OpenSSL.  The last command here updates your wget config to tell it where to find the trusted TLS certificates on a Mac.

curl -o wget.tar.gz https://ftp.gnu.org/gnu/wget/wget-latest.tar.gz
tar -xzf wget.tar.gz
cd wget-*
./configure --with-ssl=openssl
make
make -n install   # Sanity check.
sudo make install # VĂ¡monos.

echo 'ca-certificate=/etc/ssl/cert.pem' >> ~/.wgetrc

There you go!  Three hours of your life back.

Sunday, August 30, 2020

Running Kali 2020.3 on an original GPD Pocket

I recently needed to dust off my wifi skills, and to keep a low profile, I use my GPD Pocket laptop.  My install of Kali was old, so I decided to see if I could load Kali 2020.3 on it.  After much searching and futzing about, it turns out almost everything works right out of the box.  You need a couple files, some settings, and a trick with the installer.  I also found the archlinux wiki page on GPD really useful, oddly enough.
  • Run the text-mode installer.
  • When you're asked to load the brcm files from a USB drive, say "no."
  • It will successfully find all the APs around you, so select yours.
  • But, it *won't* be able to negotiate WPA2 without the missing files.
  • Tell it you're using an open wifi network.
  • Let this fail.  (If you'd told it WPA2 it it would be in a loop of failing and re-asking you the PSK.)
  • Now, select the option to continue without a network connection.
  • Install and reboot.
  • Log in to your new system.
  • (If your screen is rotated, click to the Kali logo, pick Settings, then Display, and set Rotation to "Right.")
  • Put a copy of this brcmfmac4356-pcie.gpd-win-pocket.txt file on a USB drive.  (Kali can read FAT.)
  • Write a copy into /lib/firmware/brcm/brcmfmac4356-pcie.gpd-win-pocket.txt on Kali.
  • Reboot.  (I know, I know, I could use modprobe.)
  • Log in to your system.
  • Click the Kali icon, choose Settings, then Advanced Network Configuration.
  • Double-click your SSID.
  • Go to the Wi-Fi Security tab.
  • Update your settings to reflect that you use WPA, and provide a password.
  • Save

You'll also need to tweak the touchscreen configuration, which doesn't know it is rotated, yet.

  • Edit /usr/share/X11/ xorg.conf.d/40-libinput.conf
  • Inside the "InputClass" stanza for "libinput touchscreen" add this:
  • Option "CalibrationMatrix" "0 1 0 -1 0 1 0 0 1"
  • Restart

Tuesday, September 19, 2017

Build a Puppet 5 Master on CentOS 7 -- Hella Quickstyle

Want get going with Puppet 5, but you're in some sort of an insane hurry?  Let me walk you through a "hella quickstyle" install of a Puppet 5 master on CentOS 7.  Starting with a completely new, base CentOS 7 system, here's what to do, as root.

Install the Master

I'll be using Puppet Labs' own yum repositories for the install.  The repository definition can be installed by grabbing an RPM.

  rpm -Uvh https://yum.puppetlabs.com/puppet5/puppet5-release-el-7.noarch.rpm

Now it's a piece of cake to install the puppetserver package and its dependencies.

  yum -y install puppetserver

The default configuration has the master's JVM start with a 2 gb heap size.  That's way more than I need.  (Your mileage will vary.)  Let's bring that size down.

  sed -i -e 's/-Xms2g -Xmx2g/-Xms128m -Xmx512m/' /etc/sysconfig/puppetserver

Now I can start up the Puppet server.

  systemctl start puppetserver

If you like, make a symlink to the puppet binary in /usr/local/bin.

  ln -s /opt/puppetlabs/puppet/bin/puppet /usr/local/bin/puppet

The package adds configuration for the master, but not the agent, so I'll add a stanza telling the agent to fetch catalogs from itself.

  cat >> /etc/puppetlabs/puppet/puppet.conf <<EOF
  [agent]
    server = `hostname -f`
  EOF

Now the agent should be able to run.

  puppet agent --test

Finally, I'm going to tell firewalld to allow TCP connections to port 8140, so that other nodes can request catalogs from my master.

  cat > /etc/firewalld/services/puppetmaster.xml <<EOF
  <?xml version="1.0" encoding="utf-8"?>
    <service>
      <short>puppetmaster</short>
      <description>Puppet Master</description>
      <port protocol="tcp" port="8140"/>
    </service>
  EOF

  firewall-cmd --permanent --add-service=puppetmaster   # may take two tries
  firewall-cmd --reload

Add PuppetDB

Next, I'll use Puppet to install and configure PuppetDB.  First, I need to install a module.  I'm not going to use r10k to manage the modules I need, but in the real world, you probably would.  I'm just going to use the Puppet Module Tool to throw it directly into the production code environment.

  puppet module install puppetlabs-puppetdb

Now I classify my master with puppetdb classes.  I'm going to add a node definition for my master to the site.pp manifest.  (And I'll add a default node, for the future.)  When I declare the puppetdb class, I'll tune my memory requirements down, and tell it not to manage my firewall.

  cat >> /etc/puppetlabs/code/environments/production/manifests/site.pp <<EOF
  node '`hostname -f`' {
    # Install and configure PuppetDB
    class { 'puppetdb':
      java_args => { '-Xms' => '128m', '-Xmx' => '256m' },
      manage_firewall => false,
    }
    # And configure the master to use PuppetDB
    include puppetdb::master::config
  }

  node default {
    notify { 'Default node definition ... no classification found!':}
  }
  EOF

Let's make sure it's working.  First, do an agent run, which should make the master submit a report to the PuppetDB.

  puppet agent --test

And now try a (convoluted) curl request straight into the local PuppetDB, to list nodes that are classified with the "Puppetdb" class.  Note: if you adapt and re-use this later, make sure to run it from the master.

  curl -X GET \
    --tlsv1 \
    --stderr /dev/null \
    --data-urlencode "query=[\"and\",[\"=\",\"type\",\"Class\"],[\"=\",\"title\",\"Puppetdb\"]]" \
    --cert   $(puppet config print hostcert) \
    --key    $(puppet config print hostprivkey) \
    --cacert $(puppet config print localcacert) \
    https://`hostname f`:8081/pdb/query/v4/resources | python -m json.tool

Add Agent Nodes

For quick reference, here are the steps to add just the Puppet agent to a node.  All you need to do is add a yum repo, install the puppet-agent package, aim it at your new master, and run.  Make sure  to replace FQDN_OF_YOUR_MASTER in the example below.

  rpm -Uvh https://yum.puppetlabs.com/puppet5/puppet5-release-el-7.noarch.rpm
  yum -y install puppet-agent
  cat >> /etc/puppetlabs/puppet/puppet.conf <<EOF
  [agent]
    server = FQDN_OF_YOUR_MASTER
  EOF
  puppet agent --test --waitforcert 10

Future Direction

These instructions use the Puppet module tool to install the puppetdb module.  That throws it directly into /etc/puppetlabs/code/environments/production/modules.  Most production-grade Puppet masters use 'r10k' to manage the modules that they need, automatically pulling them from version control or the forge, rather than adding them by hand.  The documentation for r10k is here.